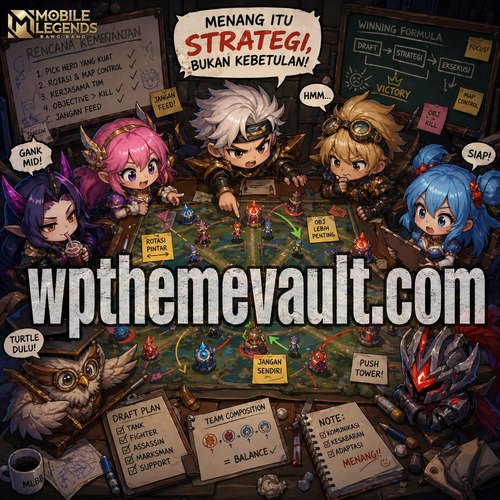
wpthemevault.com – Mobile Legends is often remembered for exciting teamfights, impressive skills, and dramatic moments, but the actual objective of the game is much simpler: destroy the enemy base before your own base falls. This distinction is important because many players become focused on kills and forget that eliminations are only useful when they create a larger advantage. A team can win several fights and still lose because it fails to damage structures, while another team can secure fewer kills but gradually destroy turrets and control important areas of the map. Learning how to play Mobile Legends effectively therefore requires an understanding of turret pressure and lane control. Every minion wave that reaches an enemy structure creates an opportunity, but not every opportunity should be taken immediately. Players need to consider where the enemy heroes are located, whether their teammates can provide support, how healthy the minion wave is, and what objectives may become available after the turret is damaged. Strong macro gameplay is often about creating multiple problems for the opposing team at once. If one lane is being pushed while another objective is threatened, opponents are forced to divide their attention. When this pressure is coordinated correctly, the enemy may lose structures without ever experiencing a decisive teamfight. Turrets also provide information and influence how safely players can move around the map. Once outer structures disappear, the battlefield becomes more open, making rotations and invasions easier. This means structural damage has value beyond the turret itself. It changes the geography of the match and creates additional opportunities for future plays. By understanding when to push, when to rotate, and when to abandon a turret temporarily, players can become much better at controlling the flow of Mobile Legends rather than simply reacting to whatever happens around them.
Learning How Lane Pressure Creates Map Advantage
Turret pressure begins with minion waves. Players sometimes approach an enemy turret and immediately start attacking, but the presence and condition of the minion wave can determine whether that action is safe. A healthy wave can absorb turret attacks and provide enough time for allied heroes to deal structural damage. Without minions, diving toward a turret can become much more dangerous because the structure continues to punish heroes while the enemy can defend freely.
Good players therefore treat waves as part of their offensive resources. Before pushing aggressively, they may clear the current wave and wait for another one to arrive. This creates a stronger push and reduces the amount of time teammates spend exposed. The timing of the wave also matters. If several enemies are visible on the opposite side of the map, a player can often push more confidently because the likelihood of an immediate defense is lower.
Wave management also helps create pressure without requiring constant fighting. A player who continuously clears and pushes a side lane forces the opponent to respond. Even if no turret is destroyed, the enemy may have to spend valuable time defending. That can prevent them from joining an objective or helping another lane.
However, pushing a wave too far can create danger. The deeper the wave travels, the more distance the player must cover to retreat. If the enemy has strong initiation tools or several heroes are missing from the map, an apparently safe push can quickly turn into a trap. Players should always connect wave position with map information.
There are also situations where holding a wave near a favorable location is more valuable than immediately clearing it. By controlling where the next wave meets, players can make the lane easier to farm and harder for opponents to approach. This is especially useful when preparing for a larger rotation.
The important lesson is that minions are not simply a source of gold. They are tools for controlling space. A well-managed wave can open a path toward a turret, force an enemy to reveal their location, or create time for teammates to move toward another part of the map.
Understanding When a Turret Is Worth Fighting For
Not every turret deserves the same level of commitment. Players need to evaluate the value of the structure and the risks involved in attacking it. An outer turret that can be destroyed safely is often valuable because it opens the map, but risking multiple deaths for a small amount of additional structural damage can be counterproductive.
The enemy’s location should be one of the first considerations. If several opponents are missing, players should assume that they may be preparing to defend or ambush the push. If most enemies are visible far away, the same turret may be much easier to pressure. This does not mean players should become overly cautious, but they should use available information to estimate risk.
Health is another factor. If a turret is already heavily damaged, finishing it may require only a short window. This can make a quick rotation worthwhile. Conversely, a full-health structure may require a longer commitment, giving the enemy more time to respond.
Players should also consider what happens after the turret falls. If destroying the structure creates a safer path toward an important objective, its strategic value increases. A turret that opens access to enemy territory can be more important than a structure that provides only immediate local pressure.
The strongest players do not become emotionally attached to a turret. If the enemy responds with overwhelming force, retreating can be correct even when the structure is nearly destroyed. Preserving teammates keeps the pressure alive and allows the team to return later.
Turret pressure is therefore a negotiation between reward and danger. The objective is not to attack structures at every opportunity but to recognize windows when structural damage can be gained without sacrificing too much of the team’s overall position.
Creating Pressure on More Than One Lane
One of the strongest forms of macro pressure comes from forcing enemies to defend multiple lanes. If the entire team pushes through the same lane without a clear reason, the enemy can often concentrate its defensive resources in one location. Multiple lanes create uncertainty.
A side-lane hero can pressure a turret while teammates prepare another play elsewhere. The enemy must decide whether to send someone to defend the side lane or remain grouped. Either choice can create an opening. If they ignore the side lane, structures may fall. If they send several heroes to defend, the remaining teammates may gain freedom around another objective.
This strategy becomes particularly effective after an enemy structure has already fallen. The expanded map gives players more room to move and makes it easier to create pressure from different directions. However, split pressure should not become uncontrolled separation. Players must remain aware of when they need to regroup.
The objective is to stretch the enemy formation without losing the ability to support one another. Good communication can make this much easier. Teammates can signal when opponents rotate toward the side lane, allowing the split-pushing player to retreat before being surrounded.
Multiple-lane pressure is also useful for managing waves before a major push. Instead of grouping immediately, players can first make sure side lanes are moving toward enemy structures. This forces opponents to deal with those waves before they can comfortably defend the main attack.
When done correctly, lane pressure turns the entire map into a problem for the enemy. They are no longer responding to one fight. They are constantly deciding which threat deserves attention first.
Using Structural Advantage to Control the Mid and Late Game
Destroying a turret changes more than the score or visual appearance of the map. It changes how heroes can move. When a defensive structure disappears, the enemy loses part of its safe territory, while the victorious team gains more freedom to enter nearby areas.
This can make rotations more efficient. Players can move deeper into enemy territory, establish pressure around jungle entrances, and contest resources with greater confidence. However, increased access should not be confused with unlimited safety. The absence of a turret means fewer defensive obstacles, but enemies can still create ambushes.
After taking a turret, players should ask what space has been created. If an enemy outer turret disappears, the team may now have better access to nearby jungle paths. This can make it easier to track enemy movement and apply pressure. A team that understands this connection will use structural victories as starting points for further control.
Players should also avoid immediately abandoning the area after destroying a structure. If the enemy has retreated, there may be another valuable action available. The team might clear nearby waves, secure an objective, or establish vision through safe positioning. The key is to continue generating value without becoming reckless.
Map control grows through these small changes. One turret opens space, that space enables safer movement, safer movement creates better information, and better information makes future objectives easier to contest.
Knowing When to Group and When to Spread Out
Mid and late game strategy often depends on choosing the correct formation. Grouping provides protection and makes coordinated fights easier, but staying grouped at all times can allow the enemy to farm side lanes freely. Spreading out creates pressure but also increases the risk of being caught individually.
The correct choice depends on the immediate objective. If a major teamfight is likely to occur soon, grouping can help ensure everyone arrives together. If there is no urgent objective, spreading pressure across lanes may produce more value.
Players should also consider enemy initiation. Against a team that excels at catching isolated heroes, excessive separation can be dangerous. Against a team that struggles to handle multiple lanes, spreading out may be highly effective.
Good macro players constantly adjust their formation. They may begin by pushing side lanes, regroup around an objective, separate again after securing it, and then regroup for the final attack. This movement should feel purposeful rather than random.
The most important factor is communication. If one player pushes a side lane while everyone else assumes a teamfight is about to start, the strategy can collapse. Teammates need to understand whether the goal is to pressure, bait a rotation, defend, or prepare for a direct engagement.
Converting Map Control Into the Final Push
The late game becomes much easier when a team has already established structural and positional advantages. Destroyed turrets reduce enemy defensive options, pushed waves force defenders to react, and controlled areas make it harder for opponents to move freely.
However, closing a match requires patience. Players should not assume that one successful push guarantees victory. The enemy may still have powerful defensive abilities, strong wave clear, or heroes capable of turning an overextended attack into a counterattack.
Before committing to the final push, the team should make sure its minion waves are positioned well. Attacking a base without proper wave support can expose heroes to excessive defensive pressure. Multiple waves approaching from different directions can create a much more difficult situation for defenders.
Players should also track enemy respawn timers. If important opponents are still waiting to return, the window for attacking may be favorable. If everyone is alive and prepared, forcing the base without sufficient advantage can be dangerous.
A successful final push often looks simple from the outside because the difficult work happened earlier. The team has already controlled lanes, removed structures, secured resources, and limited the enemy’s movement. By the time the final attack begins, the battlefield is tilted heavily in one direction.
The key is recognizing when the conditions are favorable and acting decisively. Hesitation can allow opponents to recover, but impatience can throw away a large advantage. Good players learn to distinguish between the two.
Defending Structures With Purpose
Being behind does not mean a team has no options. In many matches, defensive play can create enough time for weaker heroes to gain resources and return to relevance. The important thing is to defend intelligently rather than attempting to protect every structure at any cost.
Players should prioritize structures that provide meaningful strategic value. Some turrets may already be too exposed to defend safely, and losing them can be acceptable if it allows the team to preserve its heroes. A structure can eventually be rebuilt in importance through map control, but a death may give the enemy even more time to attack.
Wave clearing becomes especially valuable when behind. Quickly removing enemy minions reduces the opponent’s ability to pressure structures and forces them to wait for another wave. Heroes with strong wave-clearing tools can become extremely useful in these situations.
Defensive players should also avoid unnecessary pursuit. When an enemy retreats with low health, chasing them deep into enemy territory can reverse the defensive advantage. The better decision may be to clear the next wave, protect an objective, or recover resources.
A comeback usually begins with stability. Once the team stops giving away unnecessary deaths, the enemy’s lead becomes less powerful. The longer the game continues without additional mistakes, the more opportunities appear for the weaker side to recover.
Finding Opportunities for a Comeback
Comebacks rarely happen because a losing team suddenly becomes stronger than the opponent everywhere. More often, they begin when the leading team becomes careless. An enemy may overextend, split too far, start an objective at the wrong time, or underestimate a defensive setup.
Players who are behind should therefore watch for mistakes rather than forcing miracles. Information becomes particularly valuable. If one opponent appears alone, the team may be able to punish that positioning. If several enemies show on one side, the opposite side may become temporarily available for farming or structural pressure.
Resource management is also critical. A losing player should not waste the limited opportunities available. Safe minion waves, jungle resources, and objective rewards can gradually narrow the gap.
Defensive coordination can eventually create a moment where the enemy loses several heroes simultaneously. That moment should be converted immediately into meaningful progress. A comeback team does not need to destroy everything at once; securing one turret, an objective, or several waves can be enough to reset the strategic balance.
The mental aspect matters as well. Players should avoid treating an early deficit as a guaranteed loss. Mobile Legends matches can change quickly, especially when one team becomes overconfident. Remaining calm allows players to recognize opportunities that frustration might otherwise hide.
Conclusion How to Play Mobile Legends: Mastering Turret Pressure and Map Control for Consistent Wins
Turret pressure and map control are among the most important foundations of successful Mobile Legends gameplay because they connect combat with the actual objective of the match. Kills can create temporary advantages, but structures transform those advantages into permanent changes on the battlefield. Every destroyed turret reduces defensive options, opens movement paths, and creates opportunities for deeper control.
Learning to manage minion waves is an important first step. Players who understand when to push, when to hold a wave, and when to rotate can create pressure without constantly fighting. From there, multiple-lane pressure can force opponents to make difficult decisions and prevent them from concentrating their entire team in one location.
Once structures begin falling, players should use the additional map space intelligently. Safer rotations, controlled jungle access, and better objective preparation can turn one turret into a much larger strategic advantage. At the same time, teams must know when to group and when to spread pressure so that they do not become predictable.
Even when playing from behind, structural awareness remains valuable. Defending the right areas, clearing waves, avoiding unnecessary deaths, and waiting for enemy mistakes can create the foundation for a comeback. The goal is not always to win every confrontation but to preserve enough resources and map access to remain competitive.
Ultimately, mastering Mobile Legends means understanding that the battlefield is constantly changing. A turret falling changes movement, a pushed wave changes enemy positioning, and a small structural advantage can eventually become a decisive lead. Players who learn to connect these details will begin to see the match as a continuous strategic process rather than a series of unrelated fights. By controlling lanes, protecting structures, creating pressure, and converting every opening into meaningful progress, players can develop a more disciplined style of play and become much more consistent at turning advantages into victories.